My brand new drumset came to me some weeks ago, while I was on vacation. It's the first drum-instrument I ever had and I am making an effort to understand its secrets. There are a lot of things to learn...
Face Control
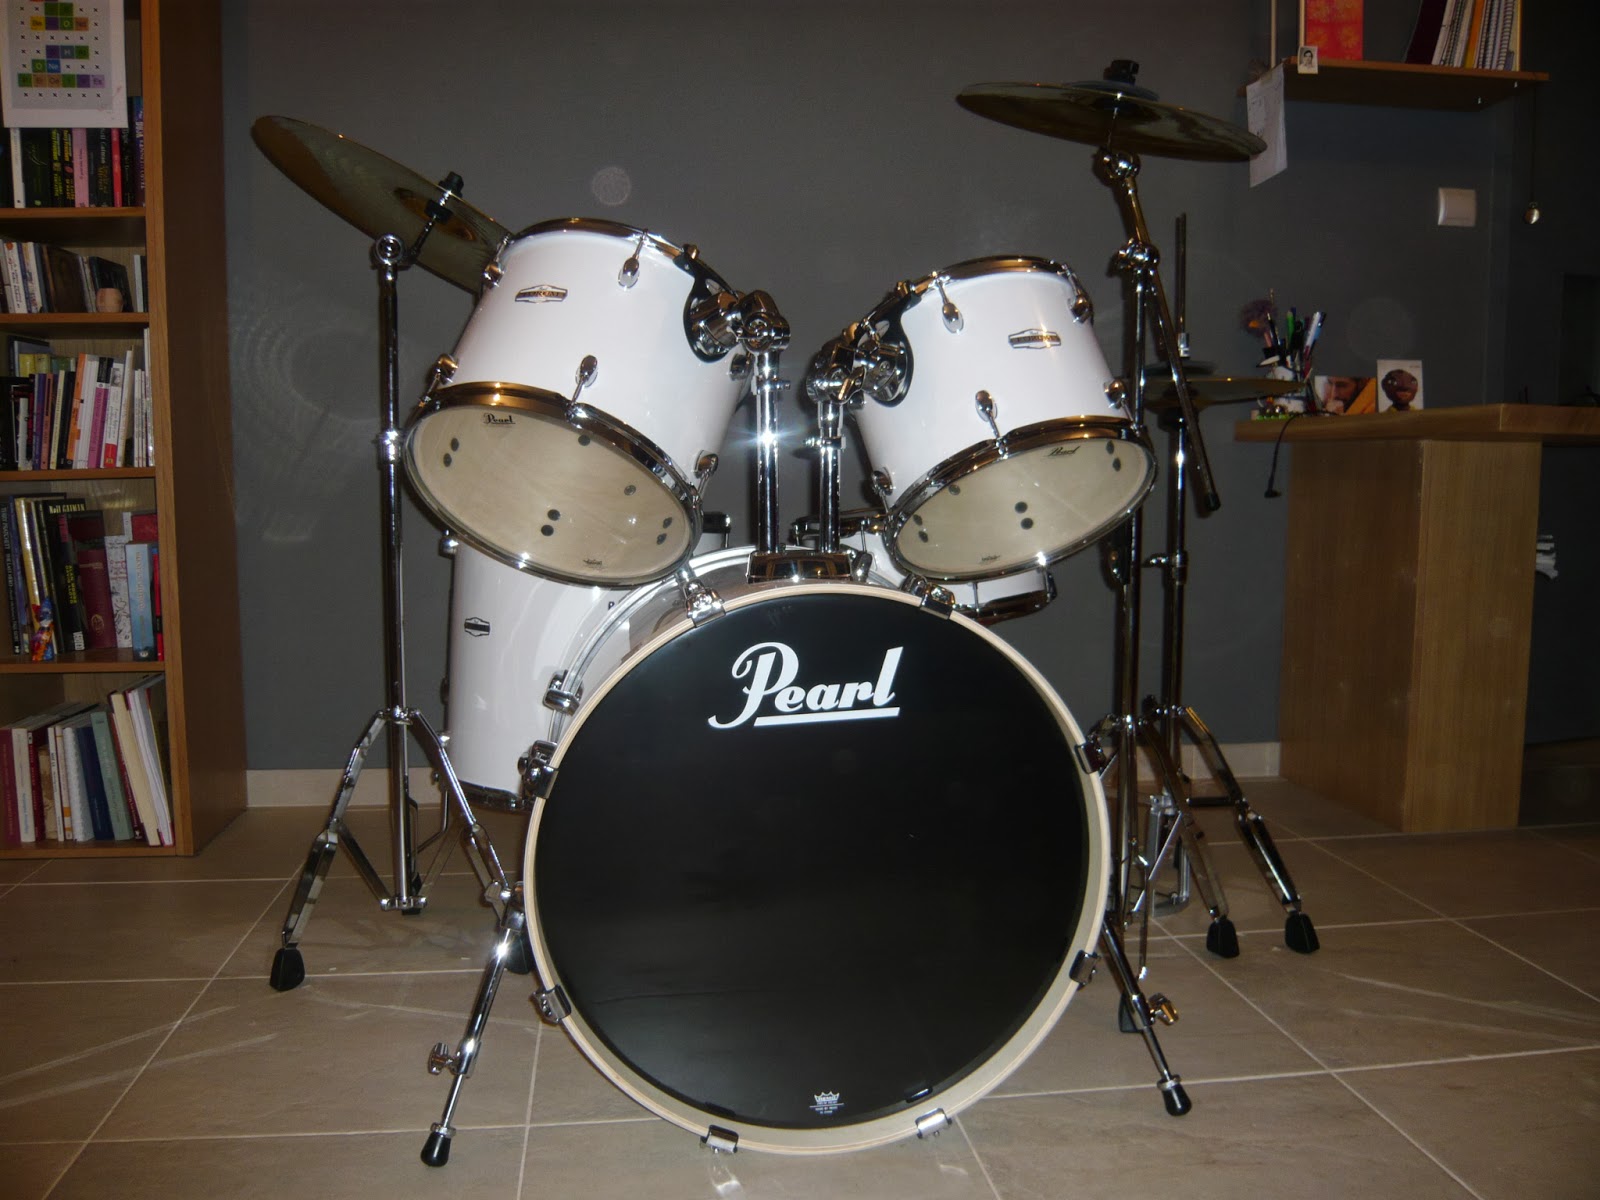
Pearl FZ 725 Z/C Forum FZ Series
Colour: Pure White (#33)
Snare Drum: 14'' * 5.5'' (wooden)
Toms: 12'' * 9'' &' 13'' * 10''
Floor Tom: 16'' * 16''
Bass Drum: 22'' * 18''
Cymbals: (Zildjian Planet Z) Ride 20'' Crash 16'' HiHat 14''
Drum Throne: D-70W
Set Up
While unpacking I was trying to find the best position for the whole drumset, including cymbals; that took me about 4 hours. It was a little bit difficult since I've never done that before.
Here are the steps I followed according to the instructions included in the kit.
During assembly everything was placed on a clean, solid surface.
Reguired Tools: a drum-key and patience!
FLOOR TOM
I put the Back Head (drum skin) on the Shell (body) followed by the Steel Hoop (drum crown=rim). I lined up the ears of the Steel Hoop over the Lugs; then I inserted the Tension Rods through the ears of the Steel Hoop and finger-tightened them into the Lug Nuts.
I turned the drum over and attached the Front Head and Steel Hoop with the remaining Tension Rods, following the same procedure.
Finally I attached the Floor Tom Legs to the Floor Tom Leg Brackets and I set the height and tilt to my preference.
BASS DRUM
I placed the Shell with the Bass Drum Spurs (legs) and the Tom Holder Bracket facing upward. I put the Front Head (with logo) on the Shell; then attached the Hoop (rim) with flat side down on the rim of the Head.
{Note: The Hoop without the Hoop Protector is used on the Front Head.}
I assembled a Tension Rod and Hook and hooked in on the Hoop above a Lug; then I finger-tightened into the Lug Nut. I attached the rest of the Tension Rods / Hooks on this side of the drum.
I turned the drum over and attached the other Head and Hoop, using the remaining Tension Rods / Hooks.
I positioned the Hoop Protector at the bottom of the Bass Drum, where the Pedal is to be attached. Finally I positioned the Bass Drum upright and set the Bass Drum Spurs with the front of the drum about an inch off the floor.
The Bass Drum Spurs have spike tips for added slip resistance that can be exposed by turning the Lock Nut and Rubber Tip clockwise.
{Note: We use the spikes only on thick carpeted surfaces to prevent damage to the flooring underneath.}
TOM TOM
I followed the same steps as for the Floor Tom, but instead of the Floor Tom Legs I used the I.S.S. mount: I loosened the key bolts on the hooks and clipped the hooks over the Upper Hoop (rim) of each tom.
I slipped the Base Plate under the edge of the Hoop and centred the I.S.S. between the two nearest Lugs; then I tightened the key bolts securely.
(The I.S.S. mount can be quickly removed and reattached when changing heads)
{Note: We keep a space between the end of the Tom Holder and the surface of the drum, to prevent damage to the drum's finish.}
I inserted the two Tom Holders into the bracket on the Tom Holder Bracket (on the Bass Drum) and I tightened the Wing Nuts on the bracket. I set and locked the short tubes on the Tom Holders.
The Tom arms are equipped with StopLocks (that lock the Brackets on the Bass Drum and Toms) and keep the drums from rotating and memorize position settings for quick and repeatable set-ups. I attached the Toms to the Tom Holders and positioned the height and angles to my preference.
CYMBALS (RIDE &' CRASH)
I opened the legs of the Stand Base to form a stable tripod and I inserted the Center Tube Assembly (medium body) into the base.
Next, I inserted the Upper Tube Assembly into the Center Tube Assembly.I adjusted the angle of the Boom Gear (modulator) and the Uni-Lock Tilter (upper modulator) to position the cymbal to my preference.
I secured tightly all Wing Bolts and Wing Nuts before playing.
I placed the cymbal over the Cymbal Post (small column) and rested it on the Lower Felt Washer. Then I placed the Upper Felt Washer on the cymbal and put the Reversible Nut on top.
The Reversible Nut can be set right-side up to allow the cymbal freedom of motion; or upside-down to restrict the motion for a tighter sound.
DRUM PEDAL
I hooked the spring to the cam roller; then inserted the Beater into the Beater Holder Likn and secured it with the drum key.
I clipped the pedal to the Back Bass Drum Hoop and tightened the Wing Bolt on the Hoop Clamp to secure the pedal to the Hoop.
I tested the action of the pedal and adjusted the Upper and Lower Nuts below the spring. I adjusted the PowerShifter forward or backward by loosening the key bolt at the heel plate to change the feel of the pedal from light, normal, heavy; I also adjusted the angle of the Beater by loosening the Key Bolt on the Beater Angle Cam to increase or shorten the throw of the beater.
HI-HAT
Footboard
I opened the legs of the stand and squeezed the Radius Rods (under the pedal) together and inserted the ends into the holes in the Support Casting. I stood the HiHat Base vertically by adjusting the width of the legs; then set the bottom of the Support Casting squarely on the floor to form a solid tripod.
Upper Section
I threaded the Upper Pull Rod into the Connector and loosened the key bolt on the StopLock, until the StopLock slid freely on the Upper Tube. I inserted the Upper Tube into the Lower Tube and set the height to my preference; then tightened the Wing Nut on the Lower Tube.
I slid the StopLock against the Lower Tube and fit the tab into the slot in the Lower Tube and tightened the key bolt. Finally I placed the Lower HiHat Cymbal on the HiHat Cup, then attached the Top HiHat Cymbal to the HiHat Clutch and tightened the Bottom Lock Nut securely.
I mounted the Clutch with the Top HiHat Cymbal attached onto the Upper Pull Rod. I adjusted the distance between the Top and Lower HiHat Cymbals to my own preference and secured the Clutch to the Upper Pull Rod by tightening the Wing Bolt.
SNARE DRUM
I opened the legs of the stand to form a tripod and inserted the Top Section into the base; then opened the basket and adjusted the Butterfly Nut as needed to accomodate the snare drum.
I placed the snare drum into the basket with the strainer positioned where it can be conveniently operated and I tightened the Butterfly Nut to hold the drum securely (but not overtightened).
{Note: We position the strainer where we can operate with our left hand.}
At the end, I adjusted the height of the Drum Throne and the distance between me and my drumset.
Afterwards I played; and still am!